

For the fourth consecutive year, our international mobile marketing agency has received this prestigious status from Google, strengthening our expertise...
17 April, 2026

Concept art is the foundation of any visual project. Its creation requires creativity, attention to detail, and strong technical skills. We’ve put together a step-by-step guide to help you go through the process of developing concept art for an animated character without common mistakes.
Concept art for an animated character is a visual representation of the hero’s design, reflecting their personality and behavior. These illustrations help define the visual style of a commercial or video game. Moreover, they establish a specific atmosphere. Typically, CGI artists create several concepts, allowing the best option to be selected later. Let’s take a closer look at each stage of the concept art creation process.
Before creating sketches, it is essential to analyze the client’s brief and define several key elements:
These qualities will determine the character’s role in the story and their interactions with other characters. During the research stage, write down any ideas and explore different contexts. Try to adapt the concept to the specifics of the brand.
Let’s assume that during the research stage, we created the following character profile:
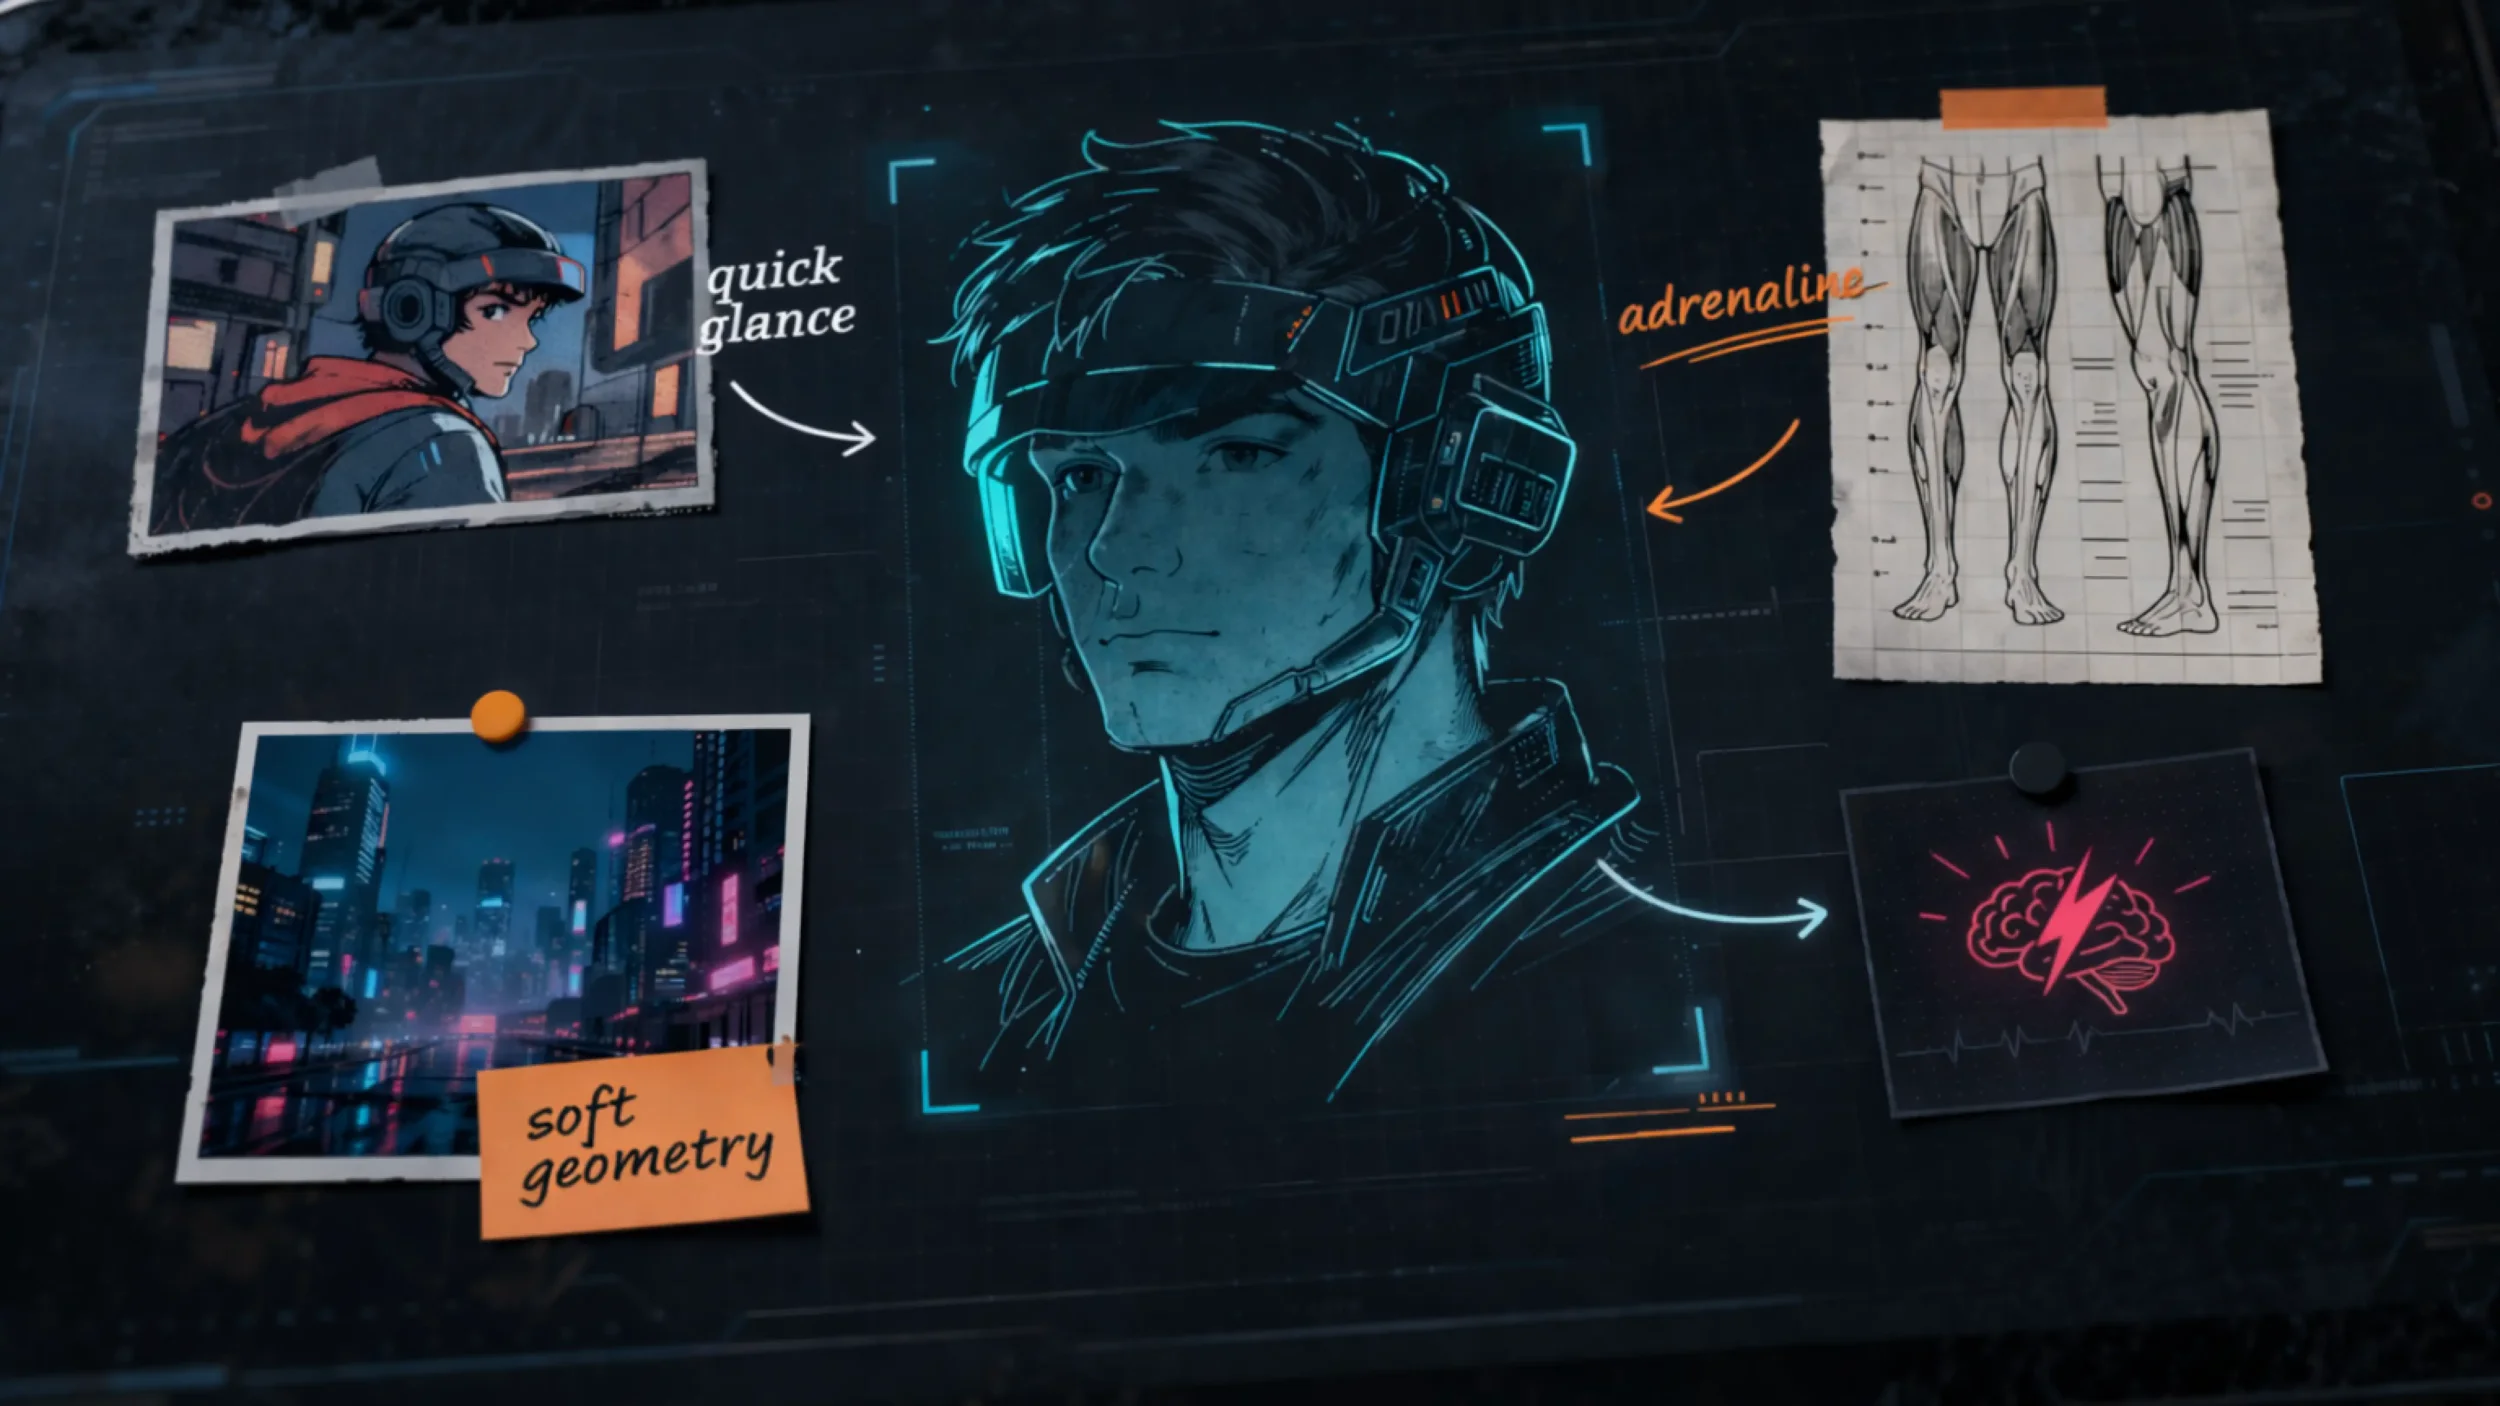
Once the 3D character profile is approved, you can move on to sketching. For convenience, you can create a mood board with the key elements. You can refer back to it during the character design process and avoid missing important details.
The second stage involves developing several versions of the character’s appearance. At this point, you can experiment with different facial expressions, shapes, poses, and silhouette proportions. Round, angular, or square geometric forms; tall or short stature; slim or heavy build — sketch multiple variations to find the most compelling design that can be refined in later stages.
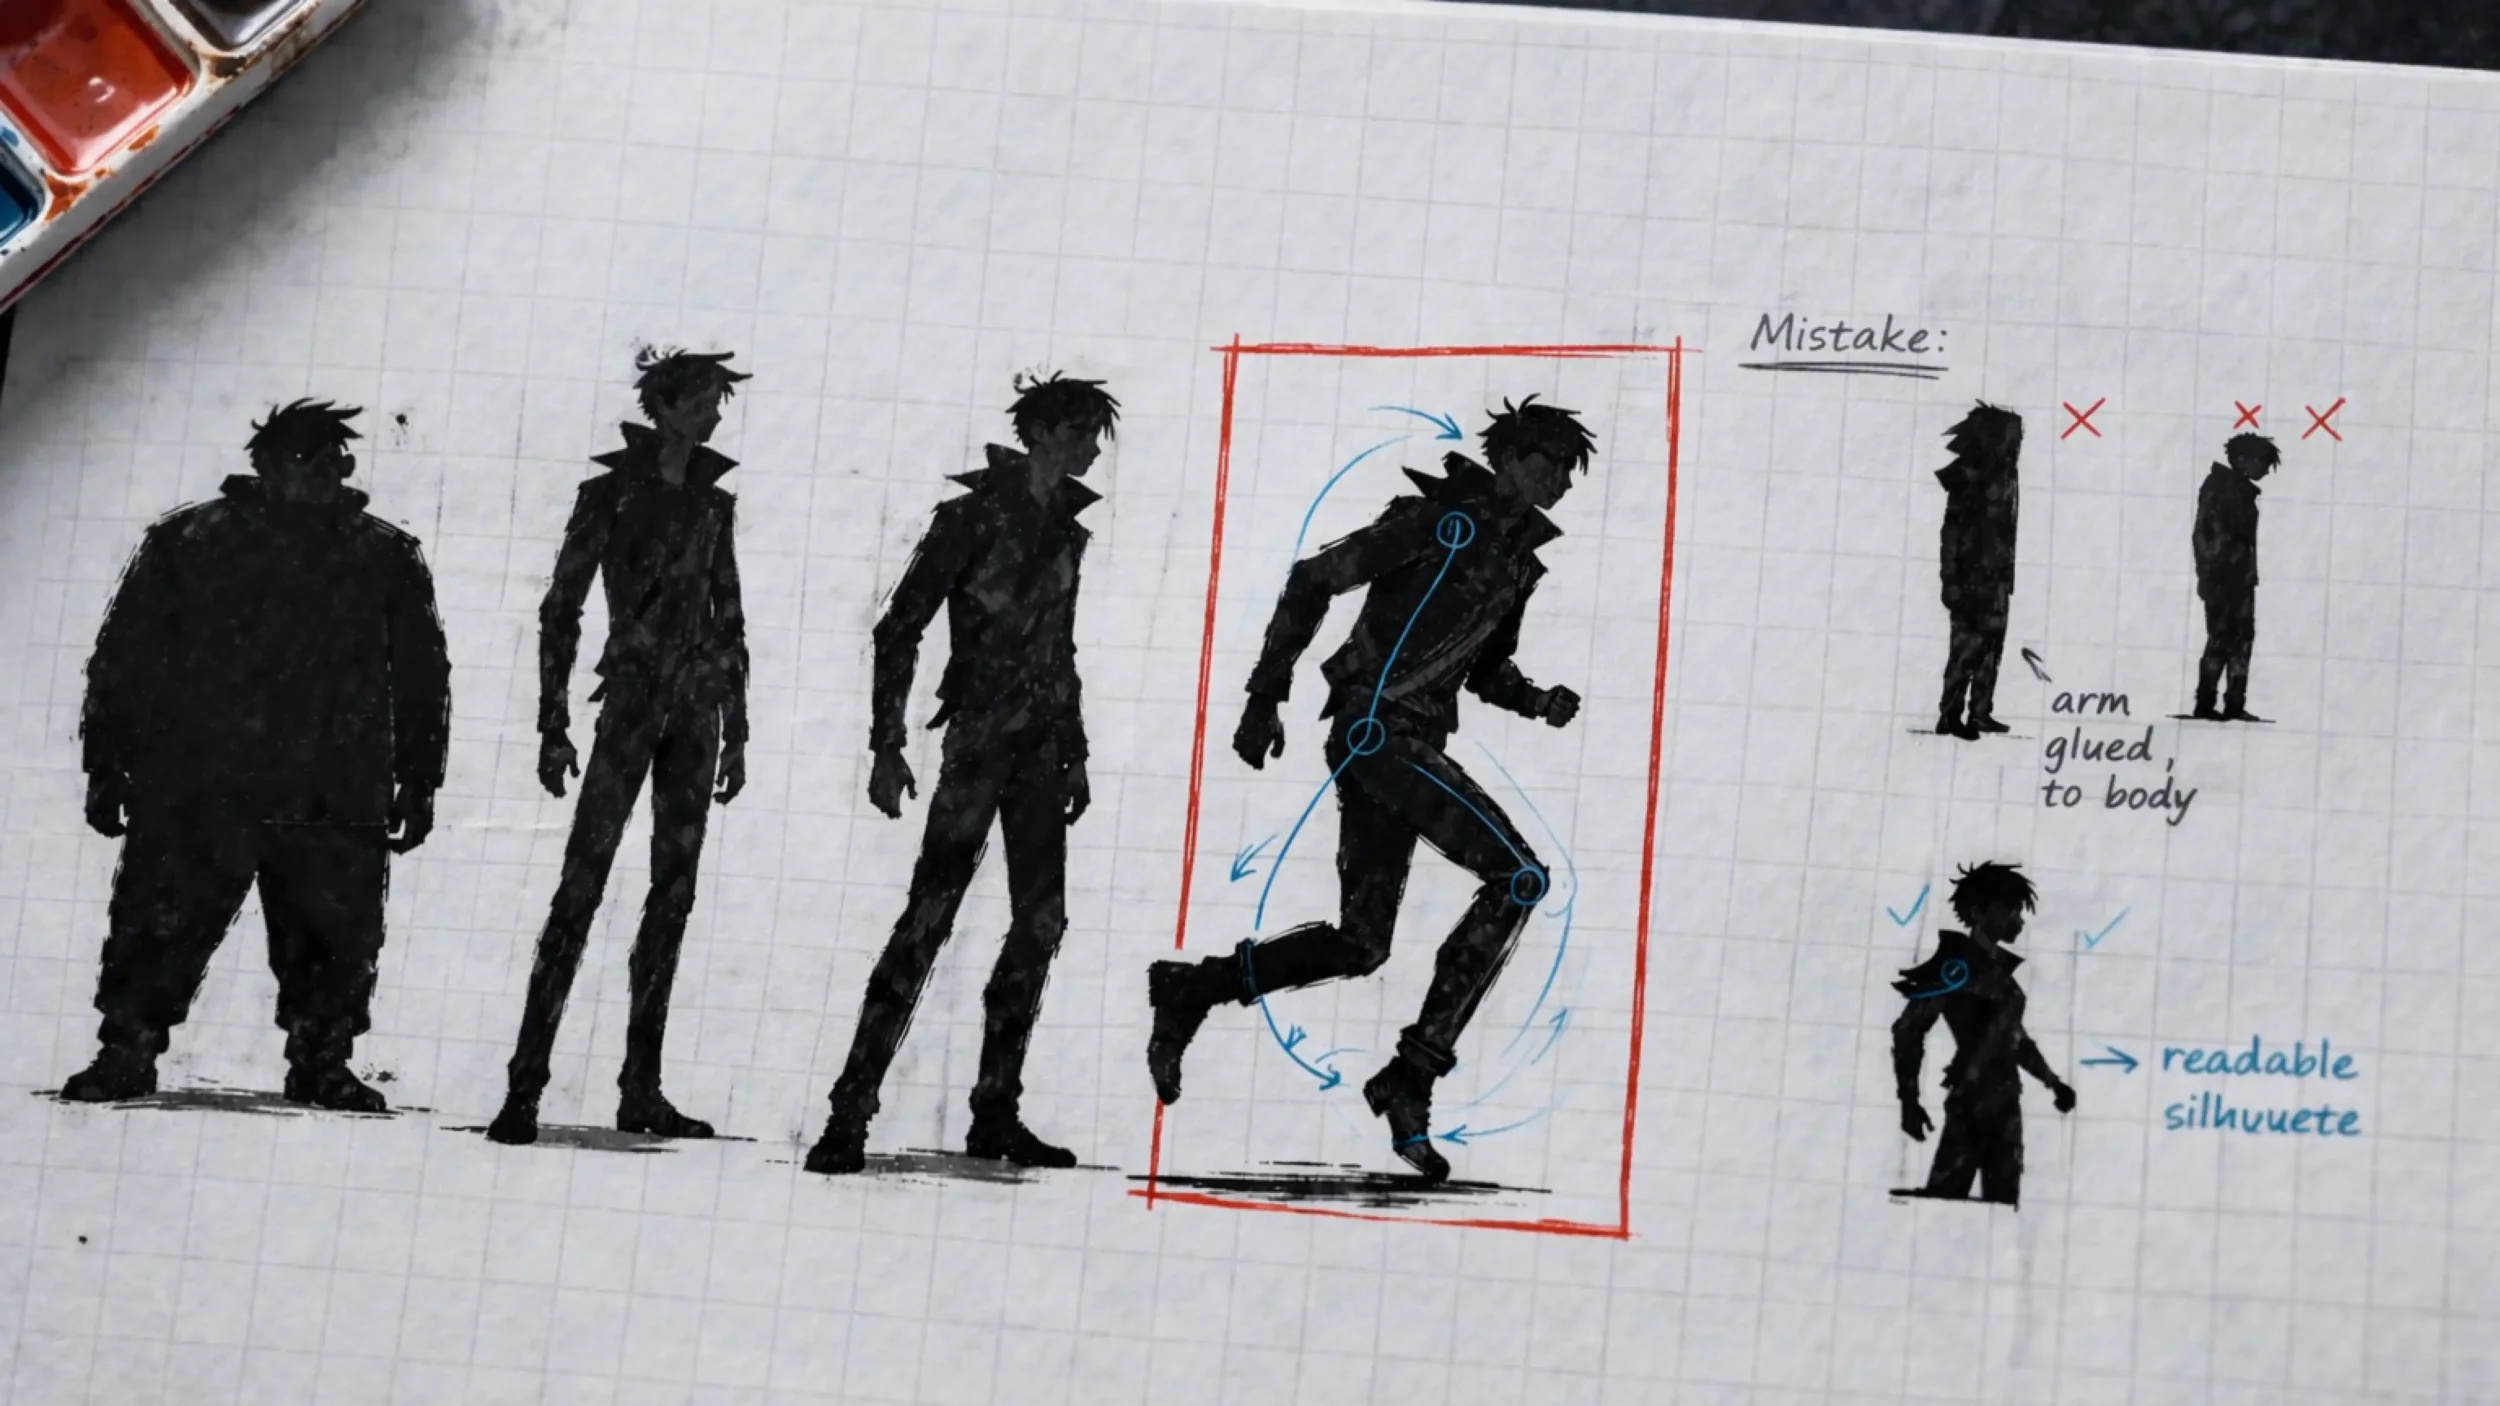
Do not forget the importance of a readable silhouette, which carries more than 80% of the visual information. The silhouette of an animated character should be clear and effectively communicate the character’s traits. In addition, you should avoid poor tangents and visual overlaps.
Creating line art involves adding clean contour lines that give the animated character structure and volume. Line thickness can vary, and a black-and-white contrast is often used. Line art can serve either as a standalone piece or as a stage in the final refinement of the sketch.
At this stage, you can add clothing, hairstyle, and accessories to the 3D character. Returning to our courier from a futuristic megacity, we would emphasize his athletic build. Afterwards, complete the look with a tracksuit, helmet, and backpack.
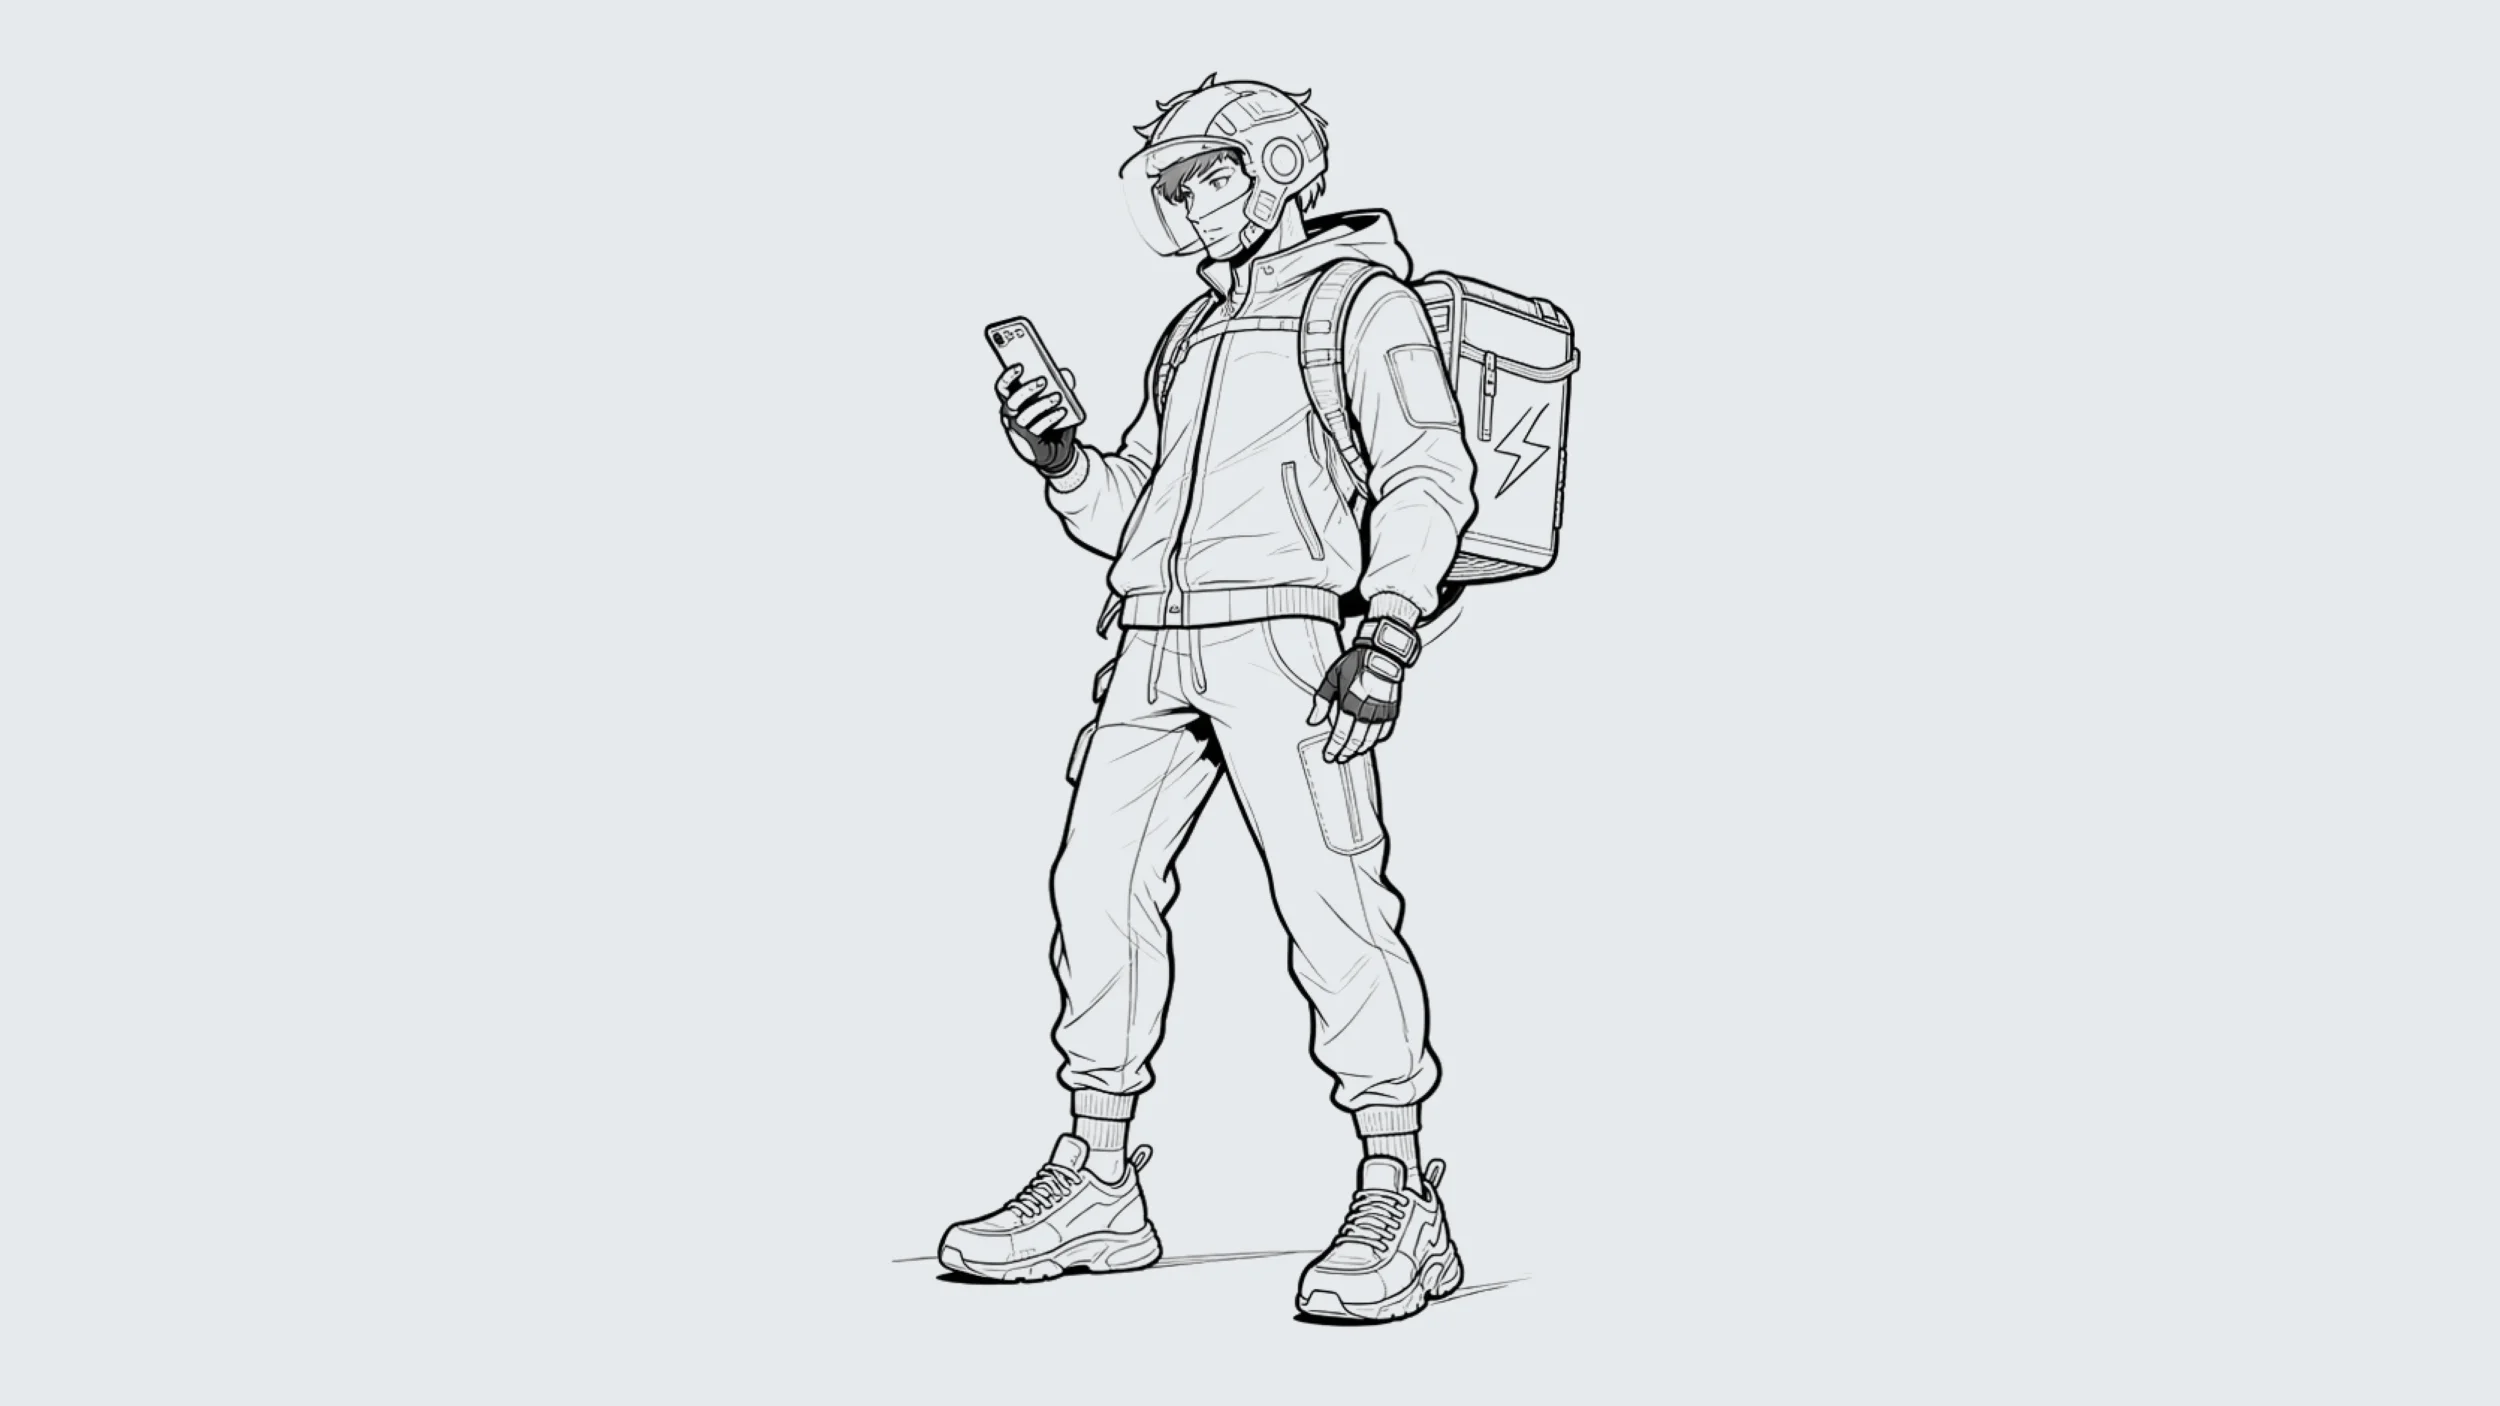
When creating concept art for an animated character, it is important to follow one key principle. Do not overload the design with details! The main goal is to find balance so that every element feels appropriate and contributes to overall harmony.
Once the line art is complete, it is time to move on to selecting a color palette. Work with small silhouette studies. Focus initially on three colors: a primary, a secondary, and an accent color. Later, you can expand the palette and add different shades. The key is to remember that colors should reflect the mood and help build associations with the character’s personality.
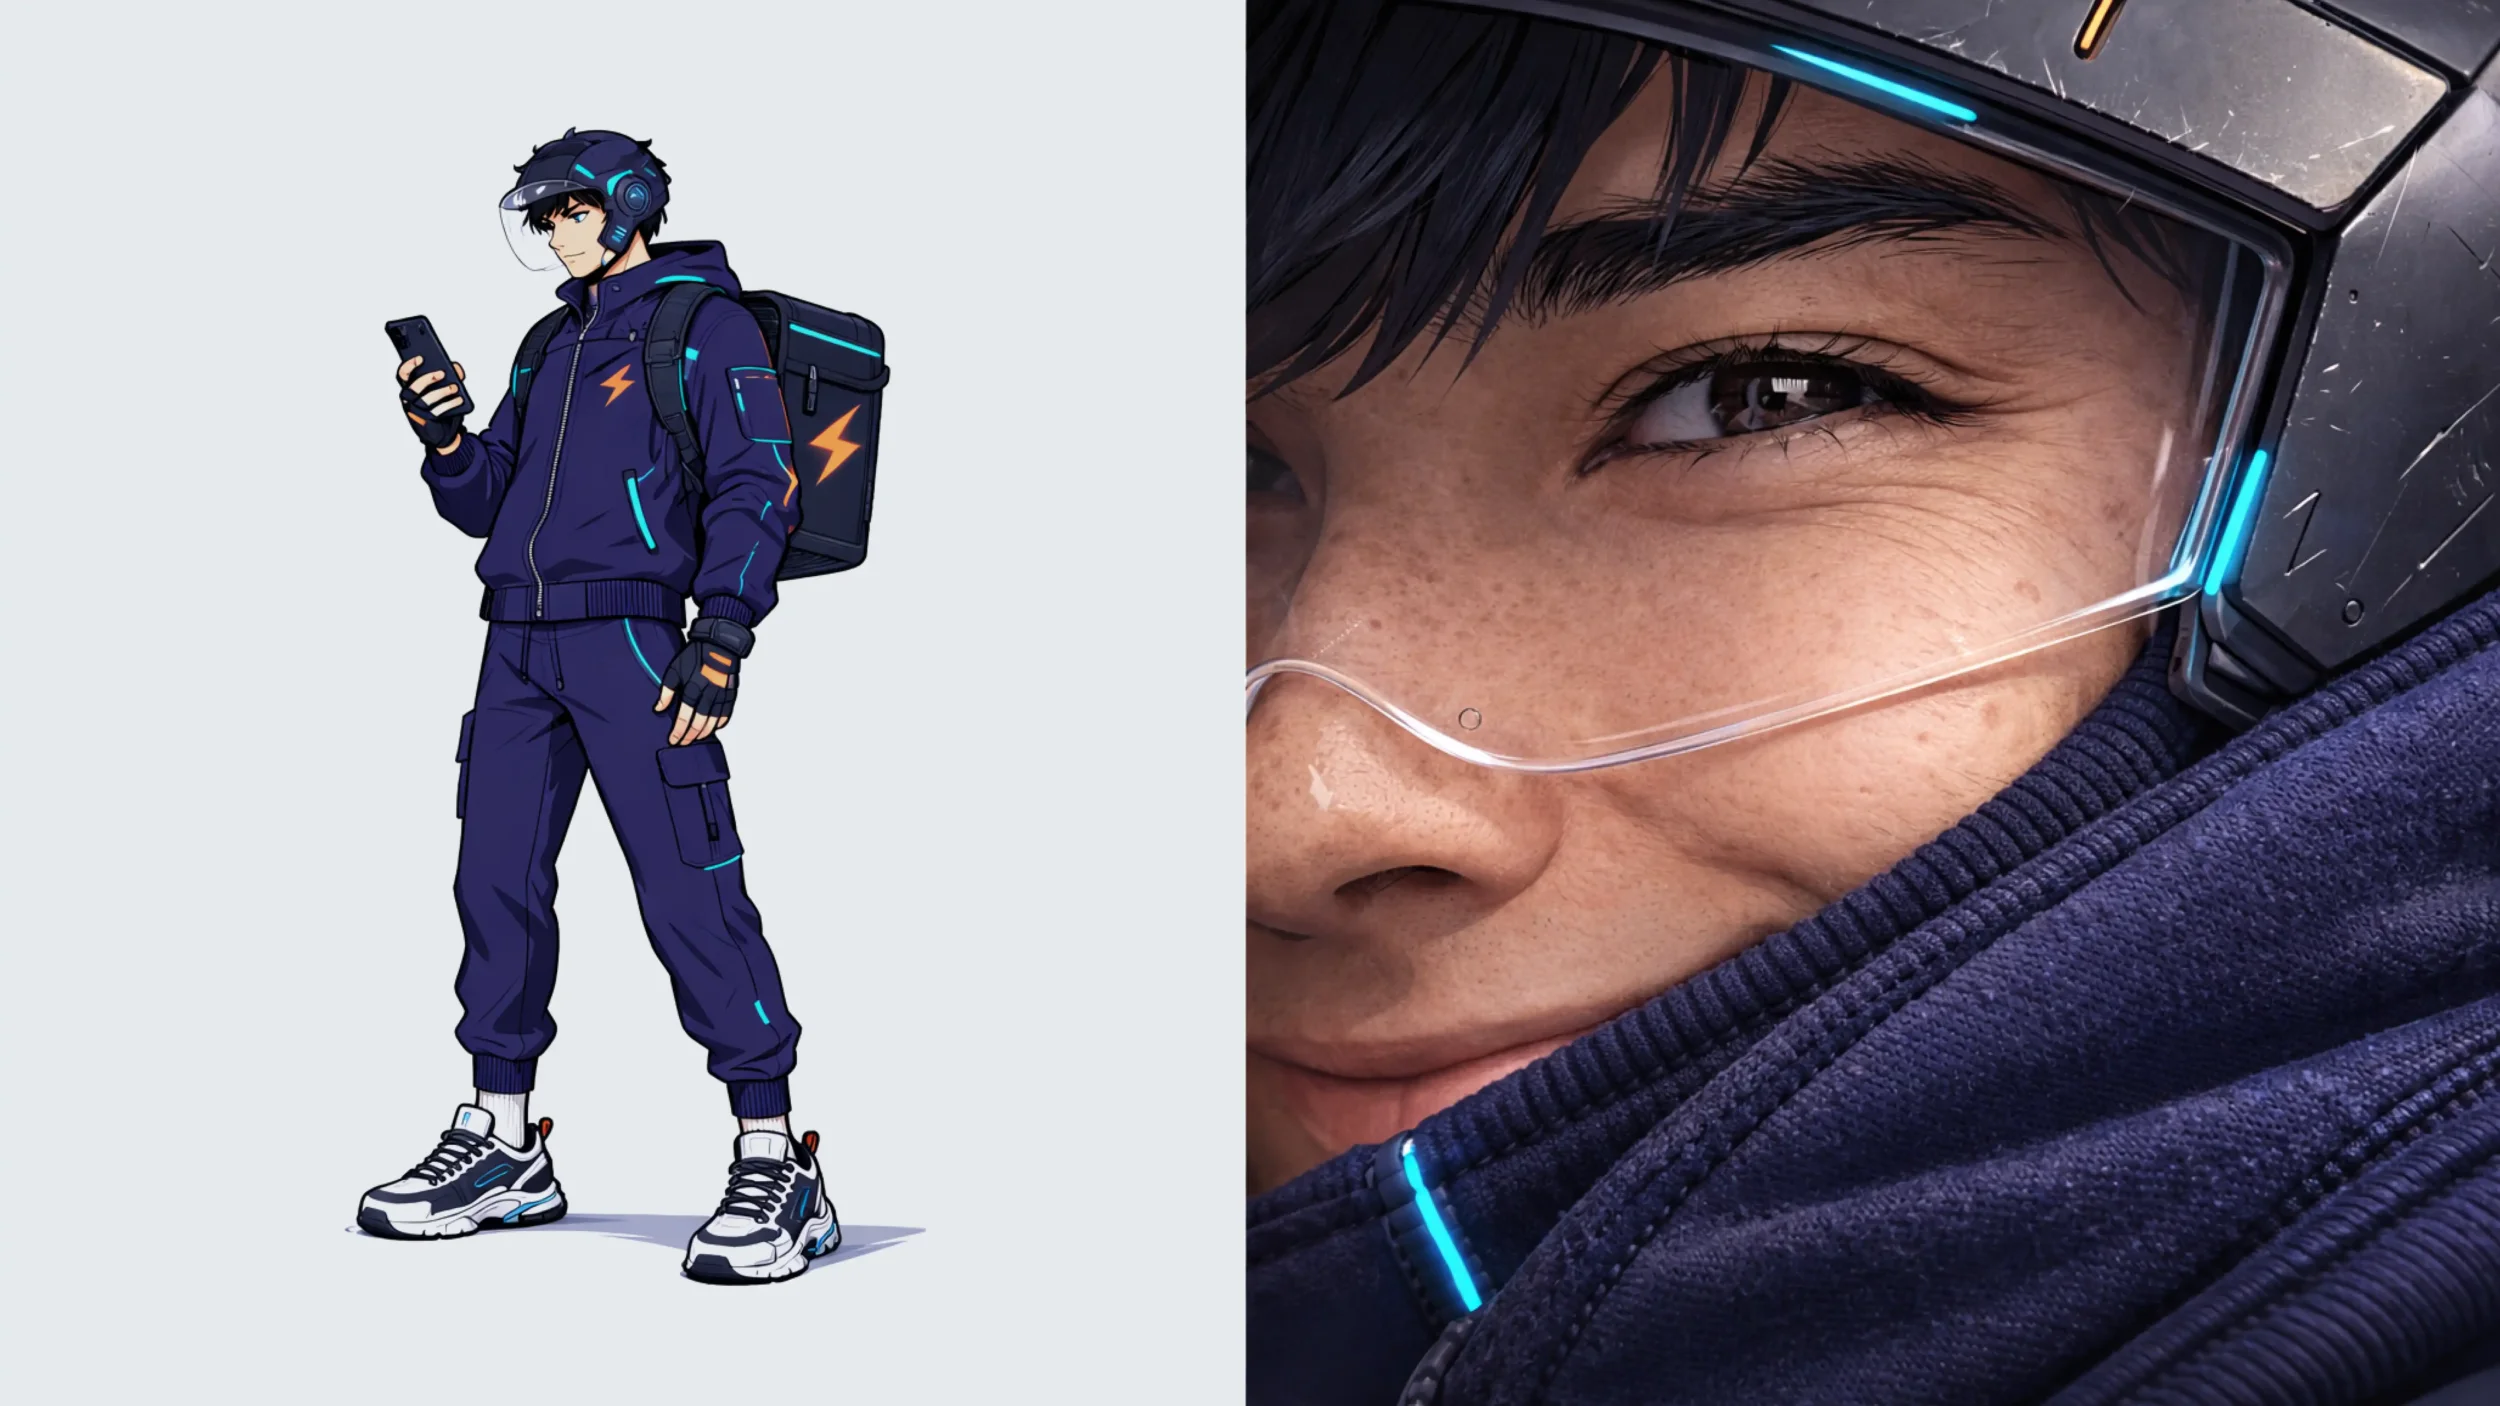
At this stage, textures for skin, hair, and clothing are also selected. They are essential for giving a 3D character a sense of life and realism. Subtle wrinkles at the corners of the eyes, barely visible pores, uneven sweater knit, or worn-out denim at the elbows — these micro-details are what the subconscious picks up on and what help create empathy with the audience.
To reflect the animated character’s behavior and make their movements believable, CGI specialists create several pose illustrations. The process includes:

In specialized 3D animation software, calculate textures, lighting, shadows, and correct geometry. By this stage, you will already have a clear understanding of which version and pose work best for your character. Add an environment to see how the character interacts with other objects in the scene.

At Acquisition.mobi, we offer the creation of illustrations, sketches, locations, and advertising key visuals that drive brand recognition and conversion. Send your request to cgi@acquisition.mobi. Our specialists will get in touch with you to discuss the project.
For the fourth consecutive year, our international mobile marketing agency has received this prestigious status from Google, strengthening our expertise...
The evolution of CGI in games reflects how the industry’s capabilities and gamers’ expectations have evolved over time. Vectors, sprites,...